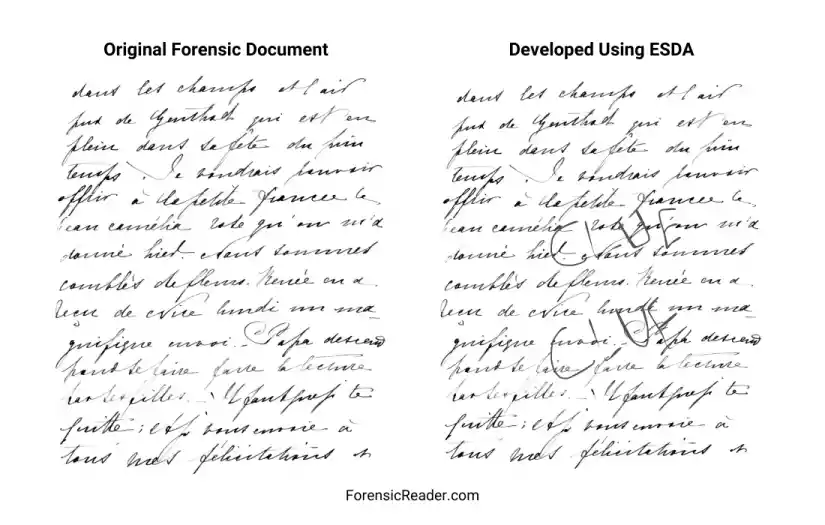
Electrostatic Detection Apparatus (ESDA) is an electrostatic detection device (EDD) specifically made by Foster and Freeman Ltd. to reveal indented writings on a paper surface.
With time, ESDA become synonymous with EEDs for detecting indented writing or marks on forensic questioned documents. Moreover, it offers a non-destructive nature of detecting indentation because it operates on the principle of electrostatic attraction.
This instrument is sensitive enough to recover indented writing several pages under the original.
History and Development of ESDA
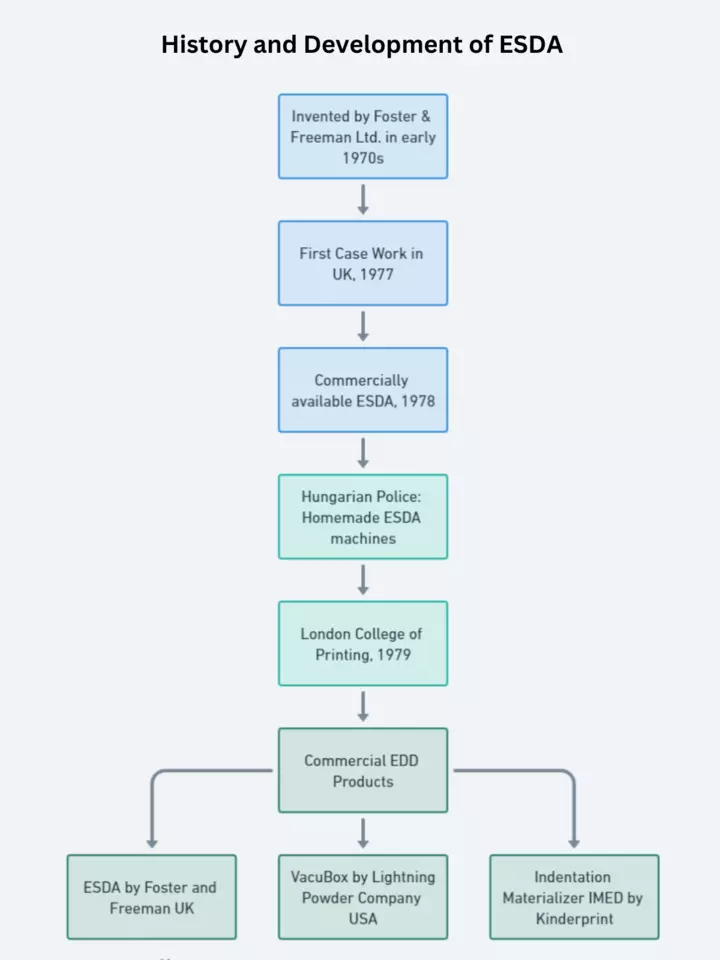
- Invented by Foster & Freeman Ltd. (Evesham, Worcestershire, U.K.) in the early 1970s.
- First Case Work: It was first used for casework in the UK in 1977 as an alternative to traditional oblique light sources.
- Commercially available ESDA: In 1978, Foster & Freeman introduced the first commercial ESDA machine.
- Hungarian Police: Development of homemade ESDA machines, contributing to early accessibility and evolution in forensic science.
- London College of Printing (1979): Foster and Morantz introduced the ESDA model at the London College of Printing, a significant step in advancing indented writing development.
- Commercial EDD Products: Over time following commercial products were developed:
- ESDA® by Foster and Freeman
- Electrostatic Vacuum Box by TetraSoc
- Indentation Materializer made by Kinderprint
Need of ESDA in Forensic Science
The following are the needs that ESDA can fulfill when compared with traditional methods. The following are the traditional methods with the limitation of detecting indentation that favors the ESDA in forensics.
A. Side Lighting
- Process: Relies on angled light to create shadows from indentations.
- Drawback: Can miss faint indentations; dependent on the angle and intensity of light; may not work well on textured or colored paper.
- Favors ESDA: A more precise and consistent method, revealing even faint indentations without any external lighting source.
B. Fluorescent powder:
- Process: Applying a Fluorescent powder to reveal hidden marks.
- Drawback: Can be messy; may adhere unevenly; risks contaminating or damaging the document.
- Favors ESDA: A controlled electrostatic charge and toner, minimizing the risk of contamination or damage.
C. Ronchi Plate Test:
- Process: A grating is used to visualize surface variations.
- Drawback: Limited to surface-level variations; may not reveal deeper indentations; requires specialized equipment.
- Favors ESDA: Can reveal deeper indentations without specialized grating.
D. Chemical Enhancement Methods:
- Process: Chemical methods involving fuming and radiology.
- Drawback: Less precise; potentially harmful to both the examiner and the document; may require specialized handling and disposal.
- Favors ESDA: A non-destructive and non-toxic method that preserves the original document.
Working Principle of ESDA
There are multiple distinct parts in electrostatic detection devices. Let’s have a look one by one.
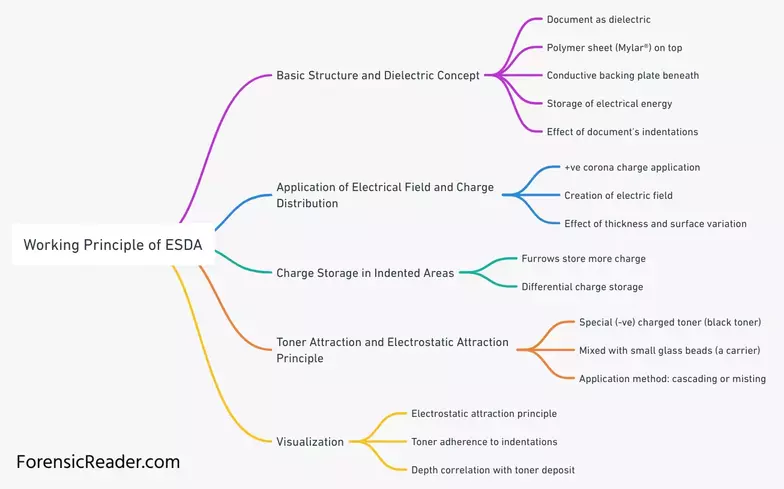
Basic Structure and Dielectric Concept: The document acts as the dielectric in a capacitor-like structure, with a polymer sheet (Mylar®) on top and a conductive backing plate beneath. In a capacitor, a dielectric material stores electrical energy, and in this case, the document’s indentations affect how the energy is stored.
Application of Electrical Field and Charge Distribution: When a corona charge is applied, it draws electrons off the surface, creating an electric field across the document. The charge distribution on imaging film is affected by the thickness and surface variation of the document. (Read Thickness Variation and Surface Variation Theory, later in the post).
Charge Storage in Indented Areas: Furrows of indented areas tend to store more charge than non-indented flat areas, even those that are microscopic in depth. This differential charge storage forms the key to visualizing the indentations. In other words, indented areas carry less negative change than surroundings.
Toner Attraction and Electrostatic Attraction Principle: A special (-ve) charged toner (black toner) mixed with small glass beads (a carrier) is then applied to the surface either cascading or misting over the cellophane surface within the chamber.
Visualization: Due to electrostatic attraction, the negatively charged toner particles are attracted to the positively charged indented areas on the mylar sheet/imaging film, adhering to the pattern of the indentations. The higher the depth, the higher the toner deposit.
Basic Theory and Models Involved in Electrostatic Detection Device
The electrostatic detection device is majorly based on two basic theories i.e. Thickness and Surface Variation theories.
A. Thickness Variation Theory
- Concept: It suggests that indentations in the paper lead to variations in its thickness.
- Electrostatic Interaction: When an electric field is applied across the paper, these variations in thickness result in differences in how the charge is stored in the indented versus non-indented areas. The areas with greater thickness (or indentations) store more charge.
- Example: Image development after application of toner on an indented sheet written beneath a top sheet with a ballpoint pen.
B. Surface Variation Theory
- Concept: This theory focuses on the variations in the surface of the paper caused by indentations.
- Electrostatic Interaction: These surface variations affect how the electric field interacts with the paper, leading to differences in charge storage. The surface irregularities caused by the indentations create a pattern of charge.
- Example: Paper first folded and then flattened out but it still creates surface variations in the form of barely visible creases. Even that, toner will adhere more to the crease due to surface irregularities, highlighting the fold pattern.
What Makes ESDA Non-Destructive?
Electrostatic Detection Device is a non-destructive analysis because of the following reasons:
1. No Chemical Interaction: Electrostatic devices don’t require any chemical process instead it uses an electrostatic process, which leaves the document chemically unchanged.
2. Physical Integrity Maintained: In the method, the questioned document is placed in between a conductive backing plate and a thin plastic film. This prevents any physical abrasive or mechanical force over the original document.
3. No Alteration to Original Writing: Only reveals indented writings without changing or affecting the visible ink, watermarks, or any other markings on the paper.
4. Reversible Process: Once the indented marking is processed, the toner can be removed after photographing. This means the questioned document returns to its original state without any residual effects.
Note: ESDA is not always non-destructive. Researcher Tolliver [1990] proves how writing material such as pencils can be altered when processed. Documents with original pencil writings processed using ESDA lose some components in terms of density.
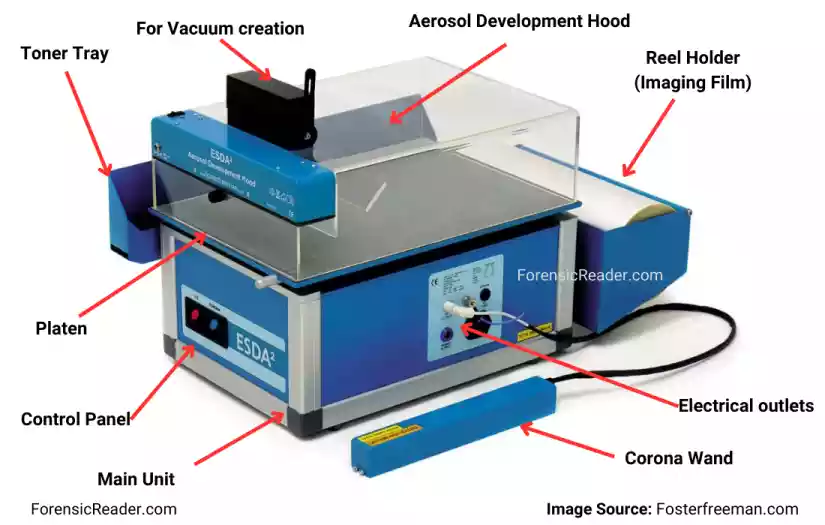
Components and Parts of Electrostatic Detection Device ESDA
There are ten main components of an electrostatic Detection Apparatus. These components are based on the new and modern form of electrostatic devices. The following table represents all the main parts of ESDA.
| Components | Function |
|---|---|
| Main Unit | The central control system manages and is composed of other components. |
| Platen | A conductive surface where the document is placed. Often has a vacuum function to hold the document firmly during the examination. |
| Reel Holder (Imaging Film) | Holds the thin, transparent plastic imaging film used to develop the electrostatic charge. |
| Corona Wand | A handheld unit that applies the electrostatic charge to the document. |
| Toner Tray | The tray holds and dispenses the toner, which is attracted to charged areas on the document. |
| Humidification Chamber | Enhances the ESDA process by controlling humidity, especially beneficial in dry conditions. |
| Aerosol Development Hood | To capture and filter out excess toner and prevent the airborne spread of toner particles. |
| Vacuum Pump | Ensures the document and the imaging film are held tightly together on the platen without any air bubbles. |
| Electrical Outlets | Supplies the necessary electrical power to the apparatus. |
| Control Panel | Located on the main unit, it allows the operator to manage various ESDA functions, like adjusting corona discharge or controlling the vacuum. |
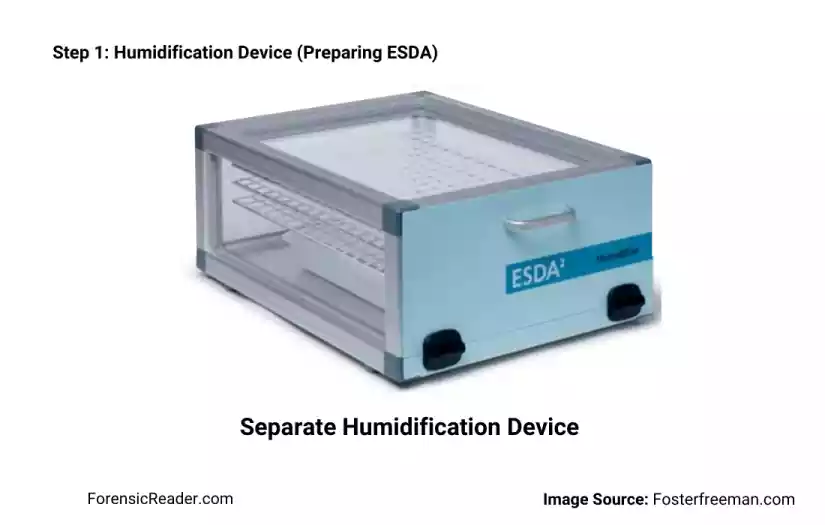
Step-by-Step Procedure of Using ESDA for Indentation Detection
P.S. If you’re doing this for the first time or using an electrostatic device after a while I will suggest you should first test the device with a control sample before jumping to real forensic documents or any indented evidence.
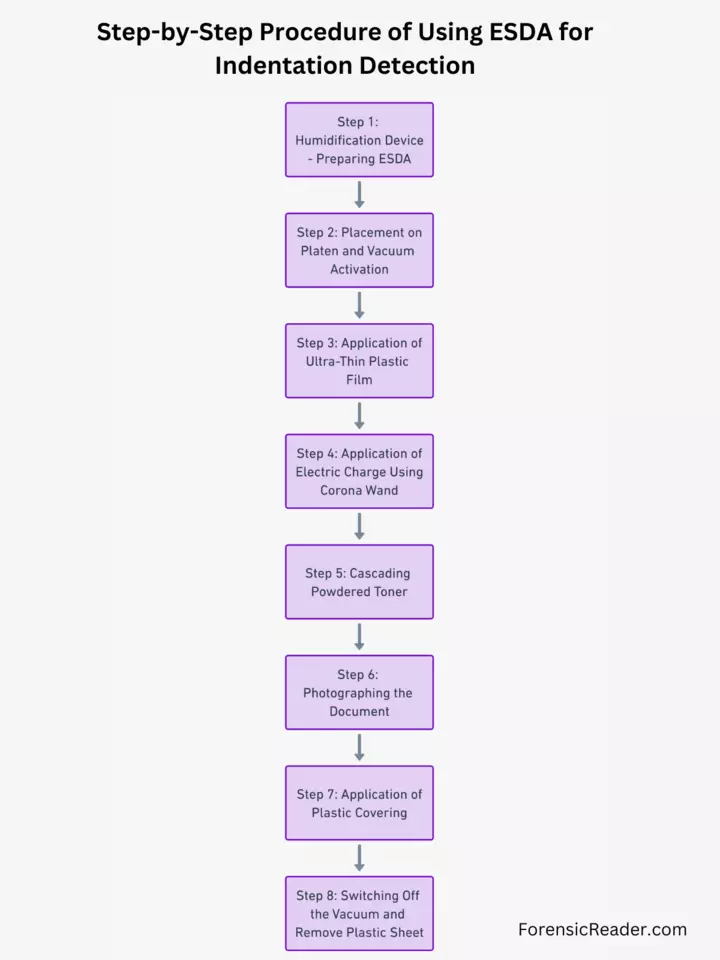
Step 1: Humidification Device (Preparing ESDA)
- Action: Place the document to be examined in the ESDA humidifier. In newer models by Foster & Freeman, ESDA2 has its own humidification chamber.
- Reason: The humidification process affects the paper’s ability to store an electrostatic charge and the efficiency of the toner.
Step 2: Placement on Platen and Vacuum Activation

- Action: Place the document onto the platen and switch on the vacuum.
- Reason: To secure the document in place and prepare it for the application of the ultra-thin plastic film. The vacuum ensures that the document is held firmly, with no air bubbles, eliminating any movement that could affect the results. Earlier, fingerprint rollers were used to roll out air bubbles.
Step 3: Application of Ultra-Thin Plastic Film
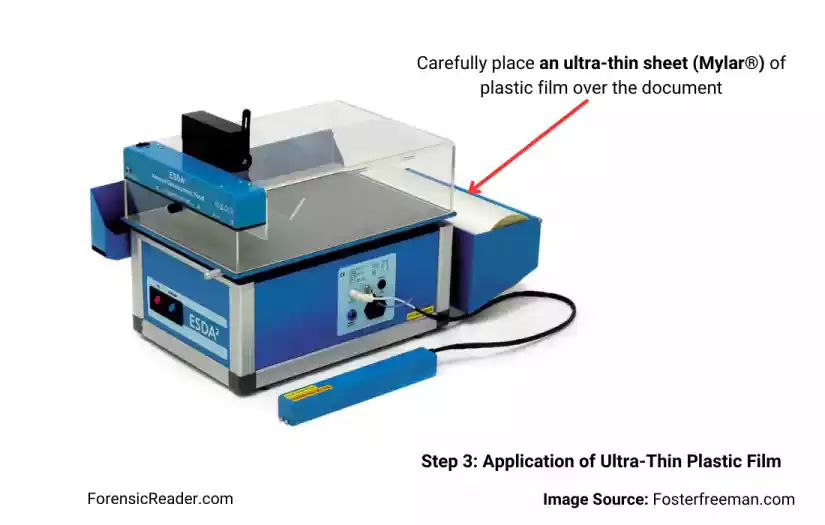
- Action: Carefully place an ultra-thin sheet (Mylar®) of plastic film over the questioned document to be examined.
- Reason: It conforms to the contours of the paper, allowing it to be pulled down into the indentations.
Step 4: Application of Electric Charge Using Corona Wand
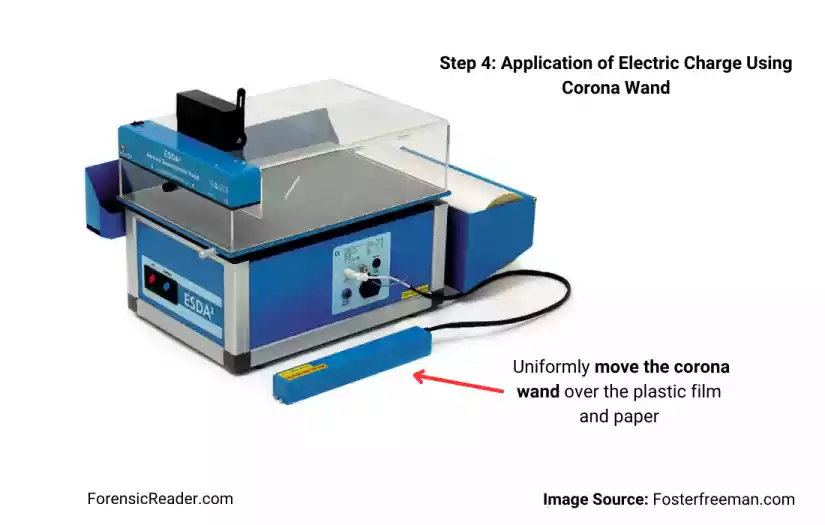
- Action: Uniformly move the corona wand/wire over the plastic film and paper and wait for a minute.
- Reason: This step applies a static charge to the plastic film and paper. The charge must be uniform and controlled.
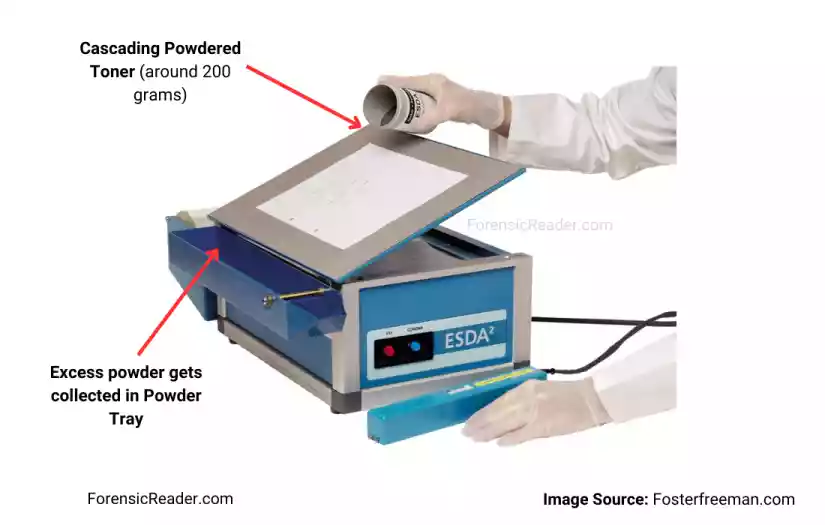
Step 5: Cascading Powdered Toner
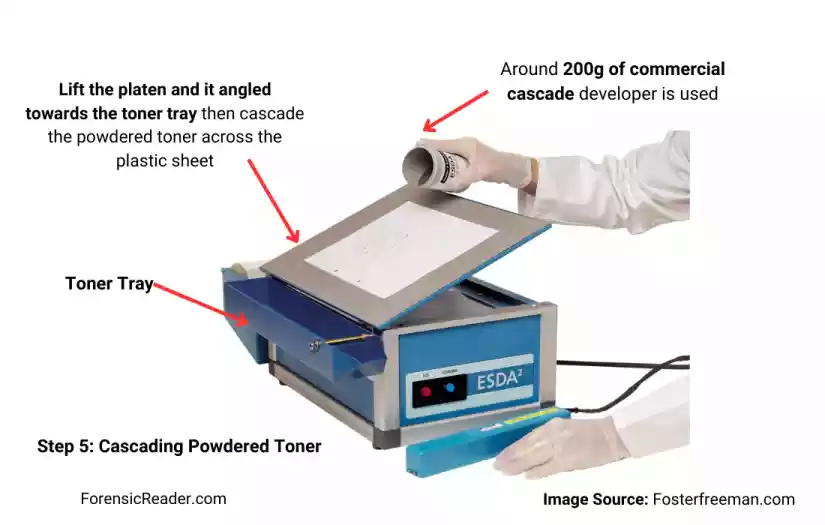
- Action: Lift the platen and it angled towards the toner tray then cascade the powdered toner across the plastic sheet. Some EDDs also involve misting/cloud toner powdered for an even and less messy spread. Moreover, EDDs such as ESDA have their own Aerosol hood to provide a controlled environment for the application of toner
- Reason: To make highly positively charged indented marks and make them visible by creating a contrasting image. Also, make sure that the toner is applied evenly.
Toner Use in ESDA
- Specifically for ESDA, around 200g of commercial cascade developer is used. Its name (cascade developer) is because it has a mixture of small-diameter glass beads with toner. They act as a carrier.
- Toner Application Methods: Two common methods include the cascade developer and powder cloud/misting methods. The cascade developer has been shown to be the most effective.
- Recently, Foster and Freeman Ltd. also introduced the “Toner Pad development system” which uses a soft, brushed-textile pad with toner. The examiner needs to simply wipe the toner pad across the surface. This system focuses on cleaner operations.
Step 6: Photographing the Document
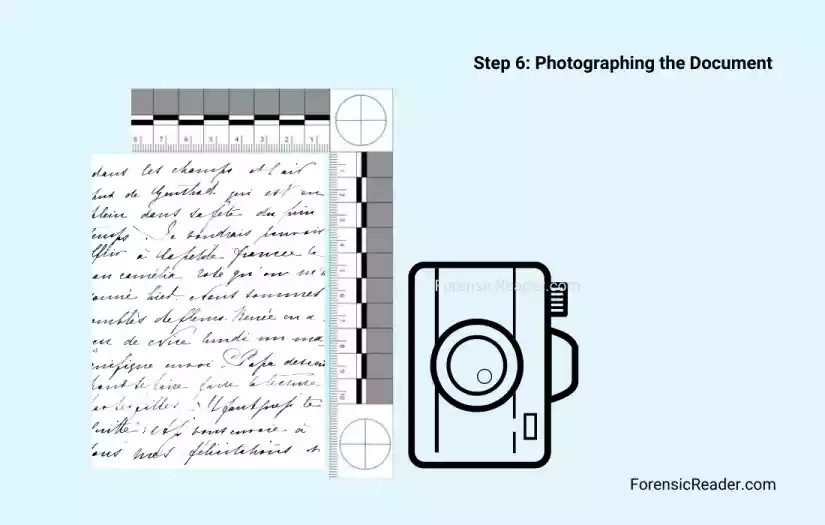
- Action: Photograph the document using a high-quality camera.
- Reason: This must be done to ensure a record of findings and allow further examination.
Step 7: Application of Plastic Covering or Laminating
- Action: Apply a low-tack, optically clear plastic covering to the plastic sheet, (or use adhesive fixing film over the plastic) leaving the original document unaffected.
- Reason: Providing a protective covering to the impression of evidence recovered, maintaining the integrity of the evidence.
Step 8: Switching Off the Vacuum and Remove Plastic Sheet
- Action: Switch off the vacuum, and the plastic sheet can now be removed from the original intact document.
- Reason: Concluding the process and preparing the document for further examination.
Newly developed ESDA2 has an airborne toner filter that can easily remove the airborne toner by vacuuming the bed and providing a cleaner operating environment.
Following is the summary of the procedure discussed earlier:
| Step | Action | Reason |
|---|---|---|
| 1. Document Placement | Place in ESDA2 humidifier | Adjust humidity for optimal examination |
| 2. Placement on Platen | Place on platen, switch on vacuum | Secure document, prepare for plastic film |
| 3. Apply Plastic Film | Place ultra-thin plastic film | Conform to contours of paper |
| 4. Apply Electric Charge | Pass corona wire over top | Impart static charge for visualization |
| 5. Add Powdered Toner | Cascade toner across plastic sheet | Make indentations visible |
| 6. Photograph Document | Photograph the document | Provide permanent record |
| 7. Apply Plastic Covering | Apply low-tack, clear plastic covering | Protect impression evidence |
| 8. Switch Off Vacuum | Switch off vacuum, remove plastic sheet | Procedure ends here |
Factors Affecting Indentation Development Using ESDA
The following are the factors that affect Electrostatic Detection Apparatus development:
1. Document Humidification
If the relative humidity is below 60%, the examiner should perform humidification. While above that percentage, there is no need for adding more humidity to paper as it can damage the document and its written (non-waterproof ink) content.
2. Paper Density
According to Roloffa et al., [2017], Paper density significantly (GSM/g/m2) affects the depth and quality of recovered impressions. Following were the findings of the research:
- Impressions on higher-density papers (130 g/m2 and 170 g/m2) were detectable only up to two sheets beneath the original writing.
- Lower-density papers (54–90 g/m2) showed impressions up to six sheets under the original writing.
3. Paper Type and Texture
Three factors related to paper type and texture affect EDDs:
Composition and Texture: Rougher texture has an uneven surface that influences the clarity of developed impressions.
- In general, recycled paper might have a rougher texture than non-recycled one.
- Affected by raw materials such as wood pulp, cotton, chemicals, etc.
Coatings: Some papers have coatings (e.g., matte, glossy) that can affect the outcomes. For instance, glossy papers might not be suitable for ESDA as the smooth, coated surface may not hold indented impressions and electrostatic charge well.
Grain Direction: All papers have a grain direction (the direction in which most fibers lie). Folding or bending paper against the grain can result in a rough edge while doing so with the grain results in a smoother edge. This will affect the very minute indentation marks and their visualization.
4. Types and Pressure of Writing Instruments
The amount of pressure applied while writing can determine the depth and clarity of the indentations. Lighter pressures might result in fainter indentations.
According to Tolliver [1990], writing instruments such as pencils are found to lose some components in terms of density making it a fairly destructive form of analysis. However, he also concluded that the developed impressions have higher impression quality that often surpasses the minor loss of pencil writing from the original document.
5. Age of the Indentations
Over time, indentations on a document can become less pronounced, making them harder to detect even using ESDA. However, as per the number, one researcher was able to develop 50-year-old indented marks using electrostatic detection devices.
6. Interference from Reverse Side Marks
Other marks or writings on the document, especially those on the reverse side, can interfere with the clarity of the developed indentations.
7. Toner Quality and Application
The quality of the toner and application method can influence the visualization of indentations. The toner should be of appropriate granularity and applied uniformly.
8. Previous Chemical Treatments
If the document has been exposed to chemicals (e.g., for fingerprint development or ink analysis), it might interfere with the electrostatic detection device (EDD) process.
9. Storage Conditions
Factors like temperature, humidity, and exposure to light can influence the document’s state and prolonged exposure makes indentation less pronounced on a substrate like paper.
Applications of ESDA
- Minute indented writing detection: Highly sensitive to indentation and can even reveal minute indentation that can’t be seen by the naked eye.
- Footwear and Tire Impressions: If someone steps on a paper or a document is run over, the pressure creates indentations which can easily be used to get footwear or tire impressions.
- Sequencing: When overlapping pen strokes are present, an electrostatic device can determine which stroke was made first (based on pressure), revealing the sequence of writings.
- Secret Writing Visualization: Hidden or lightly pressed writings that aren’t immediately visible can be brought to the forefront easily.
- Erasure and Alteration Detection: Identifies areas where writings have been mechanically or chemically erased, altered, or tampered with.
- Printer Marks Identification: Printers can leave indentations or pressure marks on paper which can be enhanced electrostatically and made visible, helping to identify the type or model of the printer used.
- Traced Forgery Detection: The amount of pressure and indentation depth is greater in traced forgery. Thus, assists in deciphering traced signatures or handwriting.
- Fingerprint Visualization: Used for the development of fingerprints on paper surfaces. But not primarily used because there are different types of fingerprint powder that do a better job than ESDA.
- Common Cases: Usually used to analyze ransom notes or anonymous letters. Read the case where it was used to solve a case.
Advantages of Electrostatic Detection Device
- Non-Destructive Analysis: It uses electrostatic charge and doesn’t alter the document chemically or physically.
- High Sensitivity: can detect even minute variation or thickness in paper’s surface.
- Versatility: ESDA isn’t just for documents. It can be used on anything that can hold an indentation, such as detecting footprints on paper.
- Quick Results: Once the document is prepared, the development process usually takes only a few minutes.
- Enhanced Visualization: Make visible even subtle variations in pressure, revealing details like the sequence of overlapping pen strokes.
- No Hazardous Chemicals: No chemicals or invasive methods are used.
- Multiple Redevelopment: Indentation writing can be re-developed more than a couple of times without altering the original document.
Disadvantages of Electrostatic Detection Device
- Humidity Factor: Both excessive humidity and dryness of the ambient conditions can affect the results.
- Chemical Interference: Certain chemicals such as chemical methods such as iodine fuming, and ninhydrin for fingerprinting can hinder the ability to get fingerprints.
- Not Effective for All Paper Types: Some papers, especially those with coatings or special treatments, might not hold electrostatic charges as effectively.
- Limited success on some surfaces: Heavyweight and thick cardboard usually give poor results. Indentation on surfaces such as plastic surfaces may not be detected.
- Challenges with Deep Indentations: Deep or heavy indented writings may not be deciphered effectively.
- Maintenance and Handling: Requires careful handling and maintenance, and excessive mechanical shock or improper cleaning can degrade its performance with time.
- Limited Effectiveness on Certain Impressions: Impressions made over plastic or other non-paper surfaces may not be detected.
- Initial Training Required: There are several steps, from humidification to charging to toner application. Each step requires expertise to ensure accurate results while dealing with evidence.
- Higher Equipment Cost: High-quality ESDA machines can be a significant investment for forensic labs.
Precautions While Using ESDA
- Document Handling: Always wear gloves and try to touch forensic documents from the edges or very lightly handed.
- Humidity Control: Ensure the ambient relative humidity is at an optimal level. If the relative humidity is below 60%, document humidification may be necessary. Avoid excessive humidification, which can damage the document or cause the ink to spread.
- Order of Examinations: If the document is to undergo other forensic examinations, such as fingerprinting or chemical analyses, ensure ESDA is performed first to avoid compromising its results.
- Equipment Check: Regularly inspect the ESDA machine for any signs of wear or malfunction.
- Clean Wand: Ensure the corona wand and other components are clean and functioning correctly.
- Toner Application: Use the appropriate (around 200 g) amount of toner. Excessive toner can obscure results, while too little might not reveal all indentations.
- Event distributed toner: Ensure the toner is evenly distributed across the document.
- Document Positioning: Ensure the document is flat and evenly positioned on the platen to guarantee uniform results.
- Storage and Preservation: If the ESDA results are captured on a plastic film, store the film away from direct sunlight and in a location where it won’t be scratched or damaged.
- Avoid Chemical Interference: Some chemicals can affect the paper’s ability to hold an electrostatic charge so make sure there hasn’t been any such exposure.
Maintenance and Servicing of ESDA
A. Servicing
- Filters: These should be replaced once they become blackened due to debris or captured toner.
- Fuses: Replace as and when required.
- General Handling: The ESDA, including its platen and wand, as well as the humidification chamber, should be shielded from damage, drops, and contamination.
- Platen: Prone to damage. Avoid damages such as scratches, dents, or any other form of damage. When not in use, it should be covered with a protective cover.
- Corona: Always place it on a flat surface.
- Humidification Chamber: Do not store water in the humidification tray when it’s not in use.
- Routine Inspections: Schedule regular assessments with expert technicians.
- Calibration: Ensure regular professional calibration for the static charges and voltages for precise results.
- Control Sample: Always test the control sample first after cleaning, inspection, and calibration.
B. Cleaning
- Regular Cleaning: Wipe the ESDA exterior with a soft, dry cloth to remove dust.
- Platen & Corona Care: Gently clean with a mild solution, ensuring no residue.
- Chemical Caution: Avoid abrasive or alcohol-based agents to prevent damage.
C. ESDA Aerosol Hood
- Frequency: Clean the aerosol hood at least once annually.
- Water-based Solutions: Use mild solutions with liquid soap, detergent, or bleach.
- Alcohol-based Solutions: Use sparingly only on the hood, as they can degrade some plastics.
- Post-Cleaning: Dry all surfaces completely before using the hood again.
Commercial Available Electrostatic Detection Devices (EDDs)
1. ESDA®2 by Foster and Freeman UK
ESDA 2 is designed for examining all types of documents up to A3 size. It comes with imaging film, cascade developer, toner pads, fixing film, and a document humidifier. Some more optional products that are used for the detection of indentation markings are:
- Toner Pad: A brushed-textile pad impregnated with toner is wiped across the imaging film to produce visible images of indented writing.
- Aerosol Hood (optional accessory): Dispenses a fine powder cloud of toner that settles over the document, attracted to the electrostatic image of any indented writing.
- Vacuum Bed: Features a powerful extraction fan and filter to remove airborne toner, ensuring a cleaner operating environment.
Features offered by ESDA®2:
- A3-sized document bed.
- Creation of permanent records.
- Repeatable without damaging the original.
- Optional aerosol hood for development.
2. Electrostatic Vacuum Box – TVC0100
- Detects indented writings, which are often overlooked but can be crucial pieces of evidence.
- Recover dusty footwear impressions from documents.
- Use a special type of plastic film called Type IW.
- Components include a vacuum pump, rolls of Type IW and SP films, a transformer, a developing brush, developing powder, a corona unit, and sheets of adhesive film.
General FAQs
How Does Humidity Affect ESDA Analysis?
- Paper Composition: Paper is hygroscopic (tendency to absorb moisture) and properties such as flexibility and thickness are affected by the amount of moisture in the paper.
- Charge Distribution: Electrostatic charge is known to be affected by moisture content. Too much or too little moisture can lead to uneven charge distribution, affecting the quality of the image produced.
- Toner Efficiency: If the paper is too dry, the toner may not adhere properly. If it’s too moist, the toner may spread unevenly and paint the document permanently.
- Potential Damage: Excessive humidification can cause the paper to become too soft, leading to tearing or other physical damage.
- Environmental Sensitivity: Some documents, especially older or more delicate ones, may be particularly sensitive to changes in humidity.
Should fingerprints be developed first or should indentations be analyzed using ESDA?
I prefer to examine the document for indentation first followed by a fingerprint. This is mainly because fingerprint residue is observed over the paper surface making them nearly permanent. Another reason is certain chemical fingerprint development methods may interfere with electrostatic detection devices.
Moreover, once the document has been examined for indented writings, various methods (including potentially destructive ones) can be used to develop fingerprints (magnetic powders are preferred)..
References:
- Seward, G.H. (1999). Practical implications of charge transport model for electrostatic detection apparatus (ESDA), Journal of Forensic Sciences. [DOI]
- Licht, G.L. & Murano, E. (2004). ESDA effects in light of current discussions, The American Society of Questioned Document Examiners [ASQDE].
- Noblett, M.; James, E., Optimum Conditions for Examination of Documents Using an Electrostatic Detection Apparatus (ESDA) Device to Visualize Indented Writings, Journal of Forensic Sciences. [DOI]
- Ellen, David M., Foster, D.J. and Morantz, D.J., “The Use of Electrostatic Imaging in the Detection of Indented Impressions,” Forensic Science International. [DOI]
- Foster, D.J. and Morantz, D.J. (1979), “An Electrostatic Imaging Technique for the Detection of Indented Impressions in Documents,” Forensic Science International. [DOI]
- Tolliver, D. K. (1990). The Electrostatic Detection Apparatus (ESDA): Is it really non-destructive to documents? Forensic Science International. [DOI]
- Roloff, B., Offa, B., & Turner, I. J. (2017). Indentation recovery threshold using the Electrostatic Detection Apparatus®. Canadian Society of Forensic Science Journal. [DOI]

FR Author Group at ForensicReader is a team of Forensic experts and scholars having B.Sc, M.Sc, or Doctorate( Ph.D.) degrees in Forensic Science. We published on topics on fingerprints, questioned documents, forensic medicine, toxicology, physical evidence, and related case studies. Know More.