Casting a shoe impression is snow is different than casting over soil or sand. Before you even start casting, as a forensic examiner, you have to first figure out what kind of snow surface it has. Is it dry snow, or wet, or soft and fragile? After considering all this, you have to choose highlighting and casting material wisely and then you can cast footprints on the snow.
Step 1: Application of Highlighting Material
Highlighting material such as Snow Print Wax, Snow Impression Wax by Sirchie, Krylon Gray Primer, and Snow Print Powder is used in snow casting for two purposes:
- To add more contrast to details on white snow.
- To insulate the snow print from melting by sunlight and rising temperature.

These are the reasons why highlighting material should be used before casting over 3D snow impressions. To know more about how to apply these highlighting materials on different snow types, you can check our post on How to Apply Highlighting Material and Photographing Rules.
Note: You should take photographs before and after applying highlighting material. This will help in preserving details prior to casting and will serve as proof that the casted impression is the same as the original impression on crime .This also adds extra security, in case casting goes wrong.
Step 2: Making A Frame Around the Impression
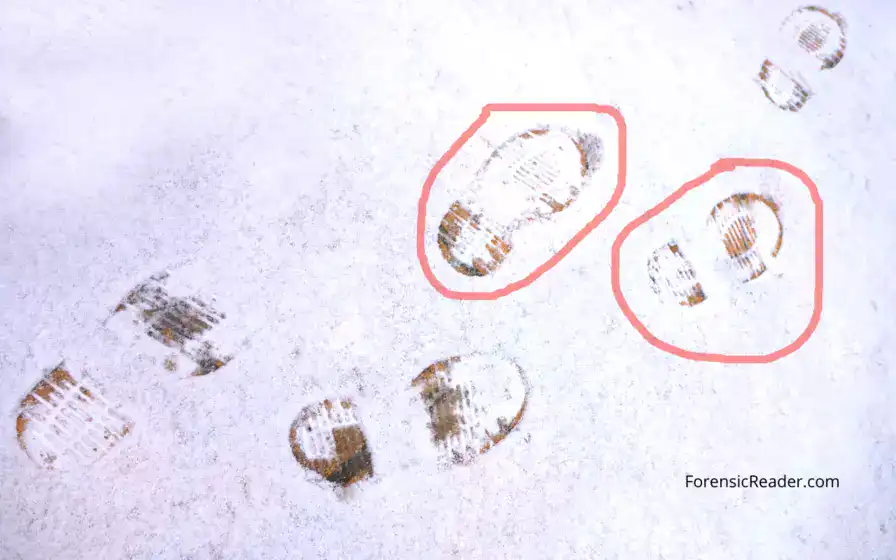
To answer the question, why is it a good idea to build a shoe frame around a show impression? To protect the prints and individualize them for casting. If a crime scene investigator discovers tens of prints. He or she is not required to cast all of the individual shoe prints made from the same sneaker. They just need 1 or 2 best-detailed shoe prints (both sneakers).
So, a frame is employed to make it easier to remember and to prevent accidental damage. It does not have to be a solid frame for snow impressions; highlighting a circle around the snow prints or simply tagging with an identifier works well.
Note: If the impression is on wet soil, highlighting material doesn’t work and is more prone to accidentally damaging. Another reason for using a solid frame is to make a rectangular casting and to make a thicker block of cast by leveling it to frame.
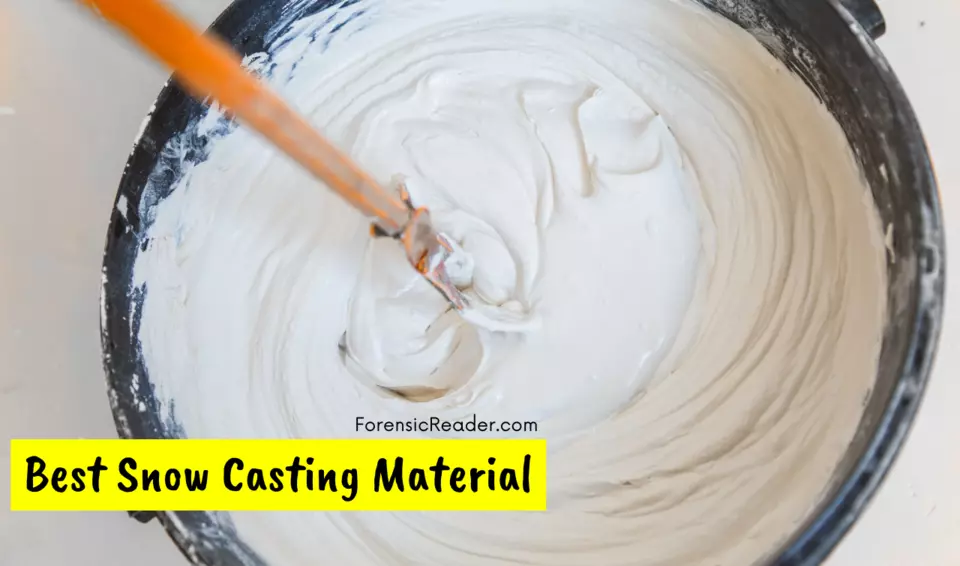
Step 3: Choosing Best Snow Casting Material For Snow Impressions

1. Dry Cast With Dental Stone
It is the cheapest, durable, and produces reasonable detailing on snow. It is also called alpha-calcium hemihydrate. Finer the powder, the higher the reproduction details. Some reputable Dental stone brands are Castone and Cast-Pro.
The general guidance for using Dental stones for snow prints:
- Wet snow: Highlighting material + 2-3mm layer of raw dental powder + Dental stone paste
- Dry Snow: Highlighting material + Dental stone paste
- Highlighting materials: at least 3 layers before applying the dental stone. The preferred one is Snow Print Wax.
- Shoe Prints: 30 to 35 c.c. (ml) water/powder (100g) ratio.
- Avoid using hastening material such as Potassium sulfate, if the temperature is above 0°C.
2. Snow Print Plaster (Snow Stone)
Snow Stone offers a quick setting, easy to use, reproduces high detailing, and can be used without highlighting material. It is one of the most recommended products for snow impressions. Commercially available in 800 grams powder bags.
The mixture of sets so quickly that even any exothermic heat is produced, doesn’t affect the casting impression. The cast sets after 10 mins.
For developing the best prints with Snow stone,
- Shifting a fine layer of dental stone with a tea mesh.
- Apply the snow stone paste without lumps.
- Paste: Equal amount of water (ml) to powder (grams). For a full bag, 800 ml of water is used.
3. Snow Print Wax
It comes in an aerosol pack and disperses red waxes. These waxes are effective for both highlighting and casting snow prints. In any case, Snow Print waxes are not enough. They need a solid base on which they can rest, and the most preferred one is a dental stone.
As a highlighting material, 2-3 fine coats are enough, whereas as a casting material, at least 3 to 5 coats should be used for a strong wax shell so that the supporting cast material doesn’t seep out.
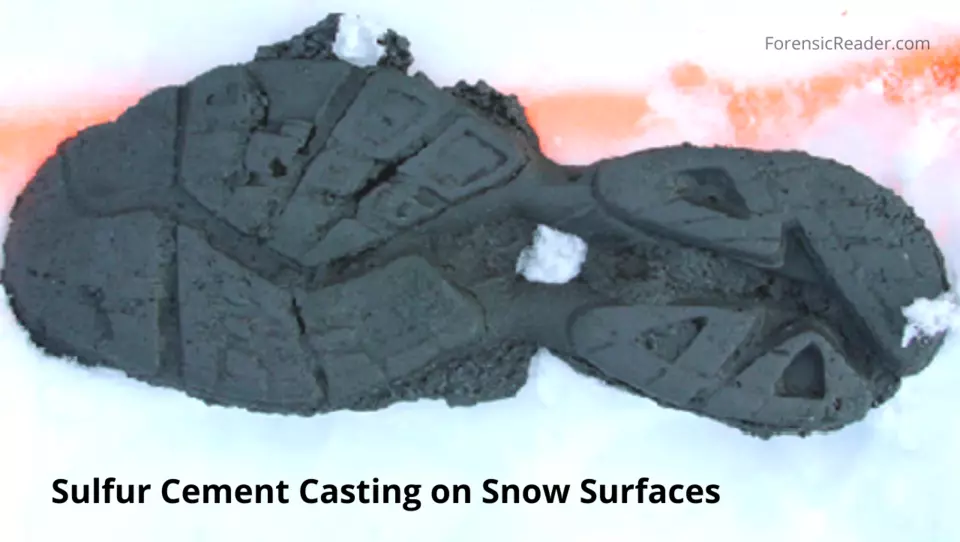
4. Sulfur Cement
Sulfur cement is a modified mixture of sulfur plasticizers and silica. It was first introduced in 2007 as one of the replacements for pure yellow sulfur for snow casting. It is less flammable and takes about 20 to 30 minutes to set.
They reproduce accurate fine details of the cast on snow but the paste preparation takes a long time because sulfur cement needs to convert into a denser liquid with steady heat and stirring.
5. Yellow Sulfur

Before Sulfur cement, yellow sulfur was the preferred material for casting over snow prints. They produce one of the most accurate features comparable to any snow casting material.
Like Sulfur cement, the paste preparations require a lot of work, and fumes from sulfur are irritating to the eyes and nose.
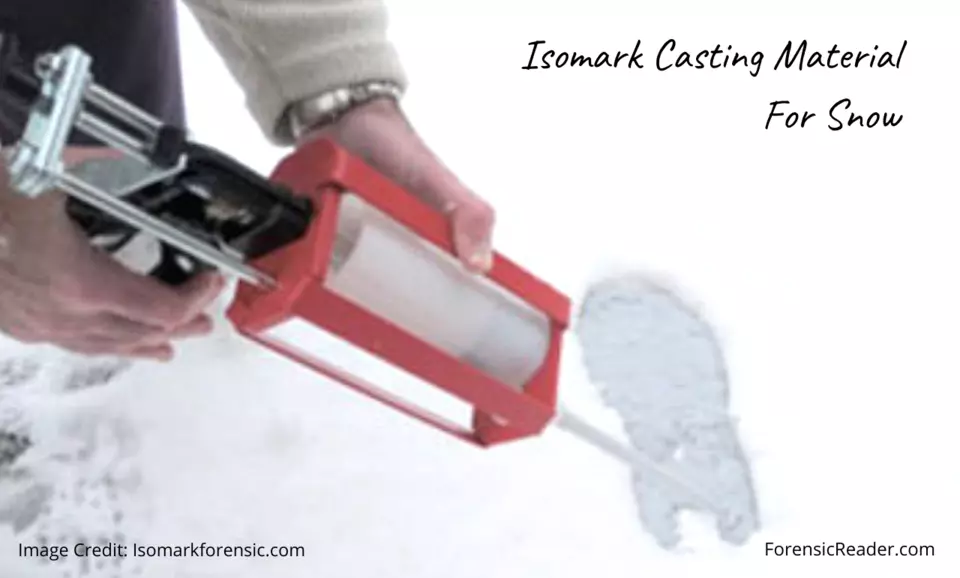
6. Isomark Casting Material
They are silicone-based casting materials with nozzle delivery systems. With it, it can be easy to make casts on vertical surfaces. This nozzle delivery system also makes it easy to use and mess-free casting experience over snow surfaces.
It also has a quick setting time of up to 10 minutes. Isomark casting material comes in syringes that can only hold enough material for one to two shoe impressions. This makes it a more expensive substitute for sulfur cement.
7. Bio Foam Blocks
N. Petraco, et.al. describe a new technique for casting snow prints that use Bioform block. According to their research, they modified commercially available foam blocks to work as casting material on snow. In the casting process, they simply state the bio-foam block over the 3D snow prints, and pressure is applied against the impression.
This technique seems to be tricky. From my point of view, the impression can get smudged if they are on soft and fragile snow. As the process is straightforward (place over the impression, press, removed) I am not going to discuss this technique in brief in the following sections.
Step 4: Preparation of Casting Material Paste For Snow
1. Preparation of Dental Stone Paste
Material Required: Dry Casting powder, Ziploc bag, water, tea mesh, Potassium sulfate.
Procedure:
- In a Ziploc bag, pour 70 ml of water.
- Slowly add 200g of powder (one shoe print) and Ziploc to the bag.
- Add 5 grams of Potassium sulfate.
- Squeeze the mixture till it becomes a fine paste.
- For better consistency, squeeze at least 5 to 10 minutes.
2. Preparation of Snow Print Plaster (Snow Stone) Paste
Material Required: Snow Print Plaster powder, water, Ziploc bag
Procedure:
- Take 200 grams of Snow Print Plaster powder in a ziplock bag.
- Pour 200 ml of water.
- Squeeze it with both hands.
- In the first few minutes, it feels watery but within 1 minute of mixing it starts thickening.
- Mix for at least 5 minutes to remove any possibility of lumps.
3. Preparation of Snow Print Wax
Material Required: Snow Print Wax, Dental stone, Potassium sulfate, Ziploc bag, water
Procedure:
- No preparation is needed for Snow Print wax because they are available in ready-made aerosol.
- As dental stone is only used to make the cast liftable, a thicker and denser paste should be prepared. So, make a 30c.c. paste (add 30ml of water to 100g of dental stone).
4. Preparation of Sulfur Cement
Material Required: Basolit Sulfur Cement, thick hot plate, electric heater, metal rod, burner, Infrared thermometer
Procedure:
- Melt 200 grams of sulfur cement in a thick hot plate on an electric heater.
- Constantly stir the sulfur cement chips with a metal rod until it forms a denser paste, usually taking 20 to 30 minutes.
- Infrared thermometers can help you to monitor the temperature.
- Cool the paste to a point where crystallization begins (differ from product to product)
5. Preparation of Yellow Sulfur
Material Required: Pure sulfur, thick electric hot plate, metal rod, Infrared thermometer.
Procedure:
- Heat 200 grams of pure sulfur in a thick hot plate over an electric heater.
- Stir the chips till it becomes soft dough and finally a denser paste.
- Heating should be done for 20 to 30 minutes and temperature can be monitored with an Infrared thermometer (maintain the temperature at most 150°C).
- Cool the paste to a point, and recrystallization begins (theoretically, below 115°C).
Note: Infrared thermometer is required to monitor the temperature of sulfur as the melting point of sulfur is around 115°C and if chips are heated beyond 170°C, it forms an irreversible syrupy, thick, brown mass that will be unfit for the casting.
6. Isomarks Casting Material
Material Required: Isomark casting kit including, casting cartridges and nozzle.
Procedure: Insert the cartridge into the nozzle dispenser and the Isomark is ready for the snow impression casting.
Step 5: Applying Paste on Snow Impressions
Before applying casting material over snow, you should follow each of the above steps such as using highlighting materials.
1. Casting Using Dental Stone (Dry + Paste)
- Spread a single layer of dental powder over moist snow if it absorbs moisture and becomes wet, sift the additional two layers.
- After a few minutes, pour the dental stone paste.
- Let it set and cure for 25 to 30 minutes.
2. Snow Casting Using Snow Print Plaster
- Spread 2 to 3mm of dry Snow Print plaster powder over snow prints using a tea stainer.
- To make a paste, combine equal parts powder and water.
- Pour the mixture directly over the impression as it starts to thicken.
- Remove the cast after 10 minutes.
3. Casting With Snow Print Wax
- Spray a layer of snow Print Wax as highlighting material from a distance of 1.5 feet and photograph it.
- Three more coats of Snow Print Wax should be applied to form a solid and rigid wax (wait for one or two minutes).
- Over the wax, pour the prepared dental stone. This makes lifting and storing casts more efficient.
- Add 5 grams of potassium sulfate during preparing paste, to hasten the setting time of dental stone.
4. Casting in Snow With Sulfur Cement
- When the temperature drops, crystallization begins, indicating that the sulfur cement paste is ready to pour.
- A V-shaped channel should be made to one side of the shoe print as a valley to deliver sulfur.
- Pour the mixture into a V-shaped valley and let it flow naturally over the impression.
- Leave it for 20 to 30 minutes.
5. Casting in Snow With Yellow Pure Sulfur
- Using an infrared thermometer, as the temperature drops to 115°C, the crystals become insoluble and this is the right time to pour it over snow.
- Make a V-shaped valley on one side of the shoe print and pour the snow on it. It tends to flow and cover the whole impression.
- Let it sit for 20 to 30 minutes.
- Applying a thick coat of dental stone to strengthen the yellow sulfur cast.
- Setting time is usually short for the thicker dental stone cast but for safety let it sit for at least 20 minutes. Add Potassium sulfate to hasten the setting time.
6. Casting in Snow Using Isomark Footprint Material
- In a nozzle applicator, place the Isomark silicone paste cartridge.
- Squeeze it, and it will disperse the mixed batter directly over the snowshoe print.
- Spatter the Isomark paste for 2 to 3 cm height and let it dry for 5 minutes.
- Now, pour the dental stone paste to give more dimensional stability and minimize the cost of casting.
Step 6: Lifting Snow Casting Material And Setting Time
For casting materials, setting time is defined as the time it takes from mixing to hardening to touch and hard enough to lift off from the surface.
| S.No. | Snow Casting Materials | Setting Time |
|---|---|---|
| 1. | Dental Stone + K2SO4 | 25 to 30 minutes |
| 2. | Snow Print Plaster | 10 minutes |
| 3. | Snow Print Wax + Dental Stone | 5 + 25 minutes |
| 4. | Sulfur Cement | 20 to 30 minutes |
| 5. | Yellow Sulfur | 20 to 30 minutes |
| 6. | Isomarks Casting Material | 10 to 20 minutes |
Step 7: Collection and Packaging of Casted Impression

Following procedures for collection and packaging of casted impressions on snow:
- Larger chunks of snow can be removed with your soft fingers.
- Avoid removing struck snow, soil, and dust from the impression. It should be done after 24 to 48 hours when casted materials reach their full rigidity and strength.
- List the important case details, such as identifier tags, casting time, setting time, casting material used, etc.
- Avoid packing any casted material in plastic bags because it may have little moisture.
- Loose bubbles are wrapped around the cast, leaving a breathable space, and packed in a paper bag or cardboard box with compartments (like a storage area compartments with fences).
- Label the package “Fragile”.
General FAQs
What is the casting material used for snow?
Dental stone, sulfur cement, Snow Print plaster, Snow print wax, and Isomark cast are some of the best materials for casting in snow.
Why does the Dental stone need highlighting material for casting on snow?
Highlighting materials act as insulators, preventing the impression from heat generated by exothermic reactions during the recrystallization of dental stones. Plus, the setting time is 25 to 30 minutes, which is long enough to melt the snow and cause smudged details.
Read More:
- 7 Importance of Casting In Forensic Crime Investigation [Explained]
- Forensic Casting Materials: How to Choose One For Different Surfaces?
- Photographing Shoe & Tire Marks on Snow With Highlighting Materials
- Forensic Photography & Scales: How To Use Them Effectively With Examples

FR Author Group at ForensicReader is a team of Forensic experts and scholars having B.Sc, M.Sc, or Doctorate( Ph.D.) degrees in Forensic Science. We published on topics on fingerprints, questioned documents, forensic medicine, toxicology, physical evidence, and related case studies. Know More.