When conducting a vehicle search, an investigator has to divide it search into majorly three main parts. This includes preliminary preparation, exterior search, and interior search.
Each has its significance in finding clues and evidence related to a crime. So, the following are the step-by-step guidelines and procedures for how to conduct a vehicle search for evidence.
Part 1: Preparation and Transportation of Vehicle
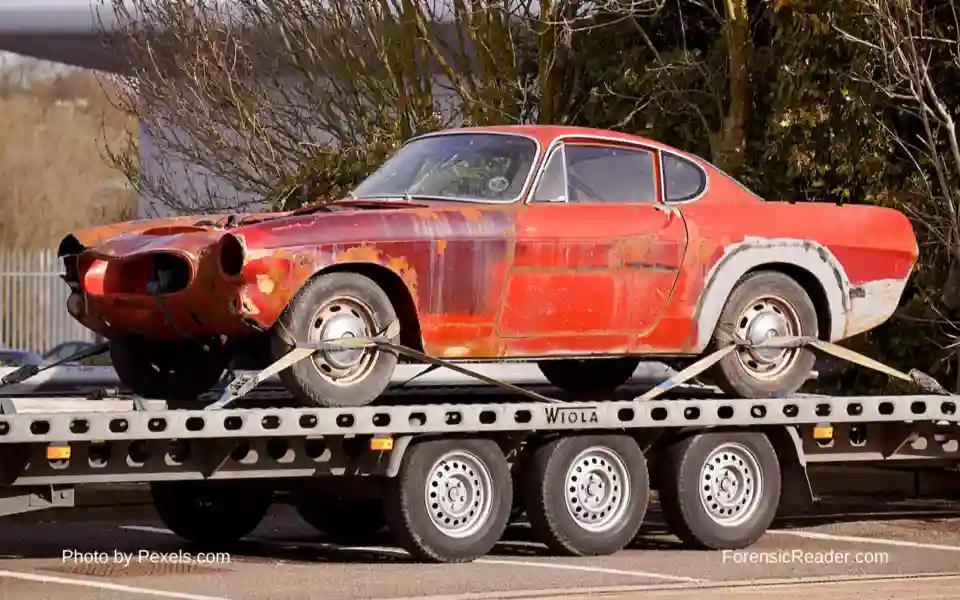
Let’s say a pickup truck is located in a remote area with a child that was missing for a week. Police rescue her but there is a lot of evidence that investigators might find about the culprit who might take her away.
So, here are the steps that should be followed before doing any exterior or interior vehicle search.
1. Search of Evidence Near Vehicle: Process the area for forensic evidence such as shoe impressions, or tire marks from other vehicles, whereabouts, and any weapons with fingerprints near the vehicle. In the case of shoe marks, use forensic casting methods.
2. Climate-Controlled Building: The best practice for conducting a vehicle search, is to do it in a controlled environment. A police building or garage would be great. However, make sure there should be ample light.
3. Seal the vehicle: Use red evidence tape to seal the doors, windows, hood, and truck and any opening that can risk the chain of custody.
Note: Make sure you don’t potentially damage the latent fingerprints while sealing the car. Try to touch as less as possible– use edges whenever possible.
4. Transport the vehicle safely: Use a rollback-type wrecker. This helps in any further damage to the tread impression or the addition of mud, sand, or soil to tires and vehicles making analysis more complicated.
Part 2: Conducting an Exterior Vehicle Search
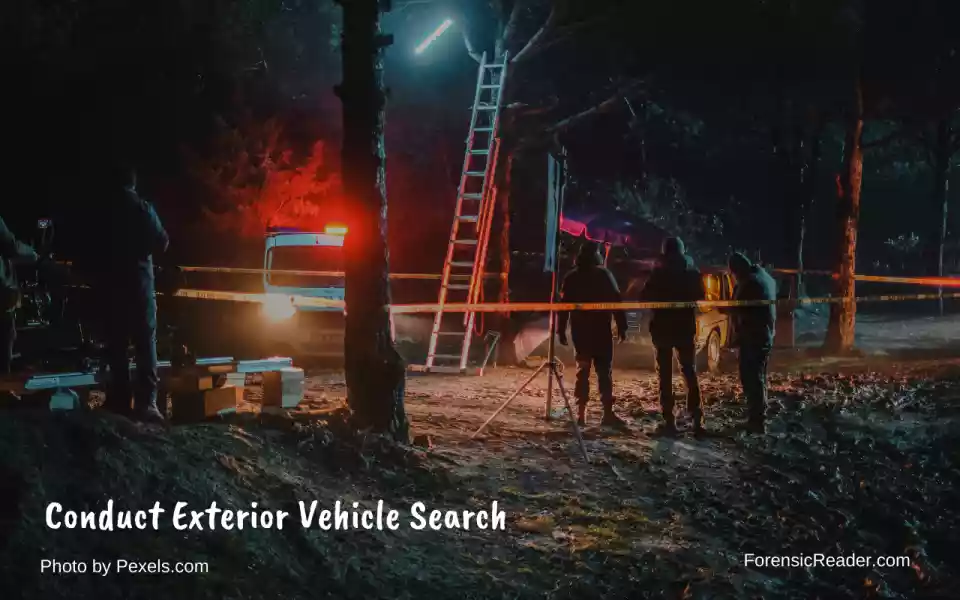
Once the vehicle arrives at the police garage, make sure to put it on the car elevator. Following are the steps that now, investigators have to follow during an evidence search on the exterior of a vehicle.
1. Start with Documentation and Photography
- Take photographs from different angles.
- Make sure to take photographs with scales.
- Make sure to include the license plate, natural color, visible damages, and any impact or visible scratches on the vehicle or truck.
- Document every detail in a crime scene notebook.
2. First Collect DNA or Trace Evidence before Fingerprint
Most of the physical and chemical development method doesn’t degrade the DNA. However, it is best practice to first collect any biological evidence or trace evidence before processing fingerprints.
- Swab the door handles, trunk release, and any areas with visible bloodstains pattern or other biological material.
- Collect any hair or fibers using tweezers and packed in a plastic container.
- Whereabouts with blood should be first air dried and then packed in a paper bag.
3. Finding Fingerprints on Cars
- Most of the fingerprints on the outer surface are easily visible with oblique lighting.
- Use fingerprint powder and regular brushes to develop fingerprints.
- Use specific blood development methods for bloody fingerprints.
- Don’t use magnetic powder and brushes (Magna brush) on vehicle metal surfaces.
- Areas to be looked for fingerprints in the car’s area: door handles, windows, side mirrors, and the vehicle’s body.
- Lift the fingerprints using forensic lifters.
4. Tire and Wheel Examination
- If it is a case of an accident, look for the damages to the wheels.
- Document an entire tire marking using fingerprint powder and lifters.
- Procedure: Dust the fingerprint powder over a tire and then use wide tape lifters to document the thread marks of each tire.
Real Case Example: Crowe had replaced the tires shortly after Jessica’s murder but still get caught. Read A Bag of Evidence Forensic Files Case: James Crowe Killer and Jessica Knott Victim
5. Paint Transfer to Vehicle.
- When a vehicle hits another object, there is a transfer of content (as per the Locards principle).
- Paints should be visibly seen if both the cars (or objects) are of a different color.
- In the case of the same colored vehicle, use alternative light to find traces of paint.
- This evidence helps to link the vehicle to the incident.
6. Undercarriage Inspection
- Lift the car elevator over the undercarriage.
- Check for any sign of damage or sign of alteration.
- In case of break failure: check for hydraulic leaks and any sign of deliberately cut.
- In the case of drugs, check for any modified or hidden compartments.
Real Case Example: In a case, Erik Schrieffer, was run over twice by Joseph Wehmanen in his pickup truck. The initial investigation doesn’t find any traces of evidence that could link Wehmanen’s pickup truck to crime. But after six months, investigators decided to tear the pickup truck bolt by bolt. Read More: How Erik Schrieffer Died and Joseph Wehmanen Caught? [A Clutch of Witnesses] Forensic Files Case
7. Headlights and Taillights Inspection
- Examine and damage to headlight or taillights (both are prone to damage).
- Check for any biological samples inside the broken lights.
- In case of drugs, check for any hidden storage compartments behind the headlights and taillights.
8. Bumper and Grill Examination
- Damages such as paint transfer, depression, scratches, and embedded debris are common to bumpers and grills.
- Look for any sign of evidence that could be related to the incident.
Real Case example: In a hit-and-run case, an athlete Rafael Garcia serve a patterned injury from the front grill of a Dodge pickup truck driven by Robert Huffman. You can read the full case form here.
Part 3: Conducting Interior Vehicle Search
Finding evidence in the interior of the car is highly likely than the exterior of the car. This is also true for adding evidence inside the car by an investigator. So, make sure you wear protective gear.
Following is the procedure for conducting interior vehicle searches:
1. Remove Protective Seals
- Remove the protective red tape evidence seals that were labeled at various openings of the vehicle.
2. Odor and Air Fresheners
- Make sure, you took notes of any odor and air freshener as soon you open the door of the car.
- This could provide information about activities that might happen.
- A smoky smell can tell the investigators, that the culprit might be a smoker.
3. Overall Photography
- Take photographs from various angles after opening each compartment.
- For example: Take a photograph of the trunk without processing it for biological or any physical evidence.
- Photographs should capture the overall condition, visible evidence, or any unique characteristics.
4. Divide the Interior into Workable Zones
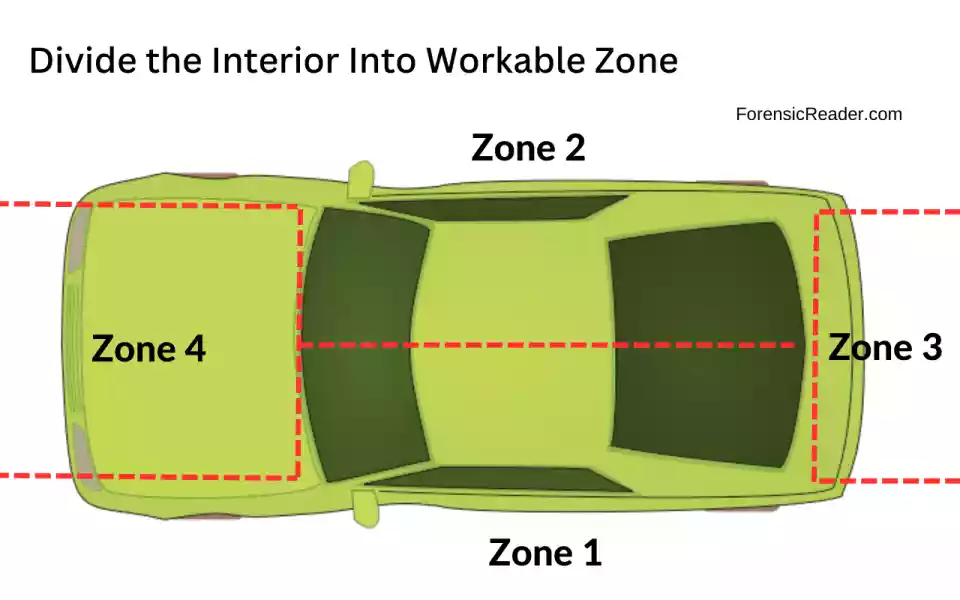
Divide the interior into workable zones to establish a routine crime search pattern. For example, start with:
- Driver side front area (front left)
- Driver side rear (back left)
- Passenger side front (front right)
- Passenger side rear (back right)
This will ensure that each compartment is thoroughly checked and examined for evidence. [Read More: Zone Search Pattern Method: Procedure, When to Use With Examples]
5. Evidence in Glove Box and Center Console
- Gloves boxes can contain different items that could help in getting evidence related to the person who was driving.
- Example:
- Vehicle papers, govt. ids.
- A letter closed with a lick and handed by bare hands can be used to get the DNA and fingerprint profile of the person.
6. Evidence from Center Console
- Center Console includes the driving wheel, stereo, and AC vents.
- Process the front dashboard for biological evidence and fingerprints.
- Swab (at least 3-4) from the driving wheel.
- Take great care of finding fingerprints on the stereo button, entertainment displays, and ac vents.
- Check for hidden containers behind the dashboard and stereos.
7. Seats and Door Panels
- Look for any evidence that may left behind by the culprit under seats and door panels.
- Lift the seat if necessary for closer inspection.
8. Engine, Trunk, and Spare Tire Compartment
- Check each item in the truck and spare tire compartment.
- Make sure to collect and preserve evidence if possible.
- Remove the spare tire, if the case is too old. This might help in identifying the car from the thread marks collected during older cases.
References:
- Stauffer, E., Bonfanti, M. Forensic Investigation of Stolen-Recovered and Other Crime-Related Vehicles. Elsevier Science. [link]
- Modern Police Practices:” Arizona v. Gant’s” Illusory Restriction of Vehicle Searches Incident to Arrest. [Link]
- Remsberg, C. Tactics for Criminal Patrol: Vehicle Stops, Drug Discovery & Officer Survival. United States: Calibre Press. [link]
- Bohan TL, et.al. Forensic Accident Investigation, Motor Vehicles [Researchgate]
- Kibayashi, et.al. Fatal traffic accidents and forensic medicine [DOI]

FR Author Group at ForensicReader is a team of Forensic experts and scholars having B.Sc, M.Sc, or Doctorate( Ph.D.) degrees in Forensic Science. We published on topics on fingerprints, questioned documents, forensic medicine, toxicology, physical evidence, and related case studies. Know More.